ECG Machine Calibration: How Signal Accuracy Is Verified
An electrocardiogram is often the first test a patient with chest pain receives. Cardiologists and emergency doctors read small changes in wave height and timing to make big decisions. ECG machine calibration confirms that the machine records those waves faithfully — that 1 millivolt looks like 1 millivolt, and that a heart rate of 60 is shown as 60.
This guide explains what is checked, how the test works and how to build ECG machines into your calibration programme.
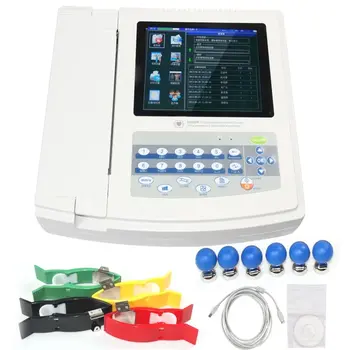
Table of contents
- Why ECG accuracy matters
- What is checked
- How the test is carried out
- How often to calibrate
- Looking after ECG machines
- A worked example: calibrating a 12-lead ECG machine
- Common problems found in ECG machines
- Records that support clinical confidence
- Preparing ECG machines for calibration
- Frequently asked questions
Why ECG accuracy matters
ECG interpretation depends on measurements: ST segment elevation or depression in millimetres, QRS duration in milliseconds, and heart rate. If the machine’s gain is slightly off, an ST change can look larger or smaller than it is. If paper speed or timing drifts, intervals are misread. Automated interpretation software relies on the same signals, so errors carry straight into the printed report.
ECG machines also age. Lead wires crack, electrodes connectors loosen and internal amplifiers drift. None of this is obvious from a normal-looking trace, which is why a structured check against a known signal is needed.
What is checked
- Amplitude (gain) — a known 1 mV signal produces the correct deflection at each gain setting
- Heart rate accuracy — displayed and printed rate at several simulated rates
- Paper or display speed — 25 mm/s and 50 mm/s timing
- Frequency response and filters — waveforms are not distorted by filtering
- Lead identification — all 12 leads are correctly derived and labelled
- Lead-off detection — the machine alerts when an electrode is disconnected
- Visual and electrical safety checks on cables, casing and power
How the test is carried out
The engineer connects the ECG machine to a traceable ECG or patient simulator. The simulator generates precise waveforms — calibration pulses, normal sinus rhythm at set rates and sometimes arrhythmias — through each lead. The engineer compares the machine’s display and printout with the known input.
- Visual inspection of the machine, lead wires and connectors.
- Amplitude and speed checks using a 1 mV calibration signal.
- Heart rate checks at low, normal and high rates.
- Filter and frequency response checks.
- Lead-by-lead verification and lead-off alarm test.
- Results, measurement uncertainty and status recorded on a certificate.
Before work starts, confirm that the parameters you need fall within your provider’s NABL scope of accreditation. Our medical device calibration guide explains why accredited status matters.
How often to calibrate
Most hospitals and diagnostic centres calibrate ECG machines at least once a year and after any repair. Machines used heavily in emergency departments, cardiology or health-check centres may benefit from more frequent checks. Record each machine with its location and due date so none are missed.
Looking after ECG machines
- Replace lead wires at the first sign of cracking or intermittent traces.
- Use in-date electrodes and good skin preparation; poor contact looks like machine error.
- Keep paper and print heads clean for readable traces.
- Report noisy or drifting baselines to the biomedical team.
The same principles apply to ECG channels in bedside monitors. See our article on patient monitor calibration.
A worked example: calibrating a 12-lead ECG machine
- Inspection. The engineer checks the case, keyboard, display, printer and paper drawer, then inspects the patient cable and each lead wire for cracks, loose clips or damaged connectors.
- Connection to the simulator. All ten electrodes are connected to the ECG simulator so every lead can be checked.
- Amplitude. A 1 mV calibration signal is applied. At standard gain, the printed deflection is measured and compared with the expected height. The check is repeated at other gain settings.
- Speed. The distance between known timing marks is measured on the printout at 25 mm/s and 50 mm/s.
- Heart rate. Normal sinus rhythm is simulated at several rates and the machine’s measured rate is recorded.
- Filters. With filters switched on and off, the engineer checks that waveforms keep their expected shape.
- Lead-off. Individual electrodes are disconnected to confirm the machine identifies the missing lead.
- Documentation. Results, uncertainty and status are recorded, and a sample printout may be attached to the certificate.
Common problems found in ECG machines
- Broken lead wires that cause noisy traces or intermittent lead-off messages.
- Worn patient cable connectors that only work when held in a certain position.
- Printer head wear that makes traces faint or uneven.
- Incorrect date and time, which affects stored reports and patient records.
- Filter settings changed from department defaults, altering how traces look.
Many of these issues are fixed quickly by replacing cables or adjusting settings, but they undermine confidence in the machine until found.
Records that support clinical confidence
For each ECG machine, keep the asset number, location, software version, calibration date, measured amplitude and speed results and any parts replaced. Attaching the calibration printout to the certificate gives cardiologists and auditors a simple visual check that the machine was working correctly. When machines are used for screening camps or outreach, record where they travelled, because transport can damage cables and connectors.
Preparing ECG machines for calibration
Before the visit, gather every ECG machine in the hospital, including those in outpatient clinics, health-check departments and ambulances. Load fresh paper, clean the print head and make sure each machine has its full set of lead wires and patient cable. Tag any machine with a known fault, such as noisy traces or printing problems, so it can be investigated during calibration. If a machine is used for screening camps, bring it back in advance so it is not missed.
After calibration, keep the sample printout with the certificate and confirm the correct date and time settings before the machine returns to service.

Frequently asked questions
What is the 1 mV calibration signal?
It is a standard reference pulse. At normal gain, 1 mV should produce a 10 mm deflection. Checking it confirms the machine’s amplitude is correct.
Can ECG machines be calibrated on-site?
Yes. Portable ECG simulators allow calibration in the department, with minimal downtime. See our onsite calibration services.
Does calibration check the interpretation software?
Calibration verifies the signal the software analyses. If the signal is accurate, interpretation starts from correct data; the clinical algorithm itself is the manufacturer’s responsibility.
Do stress test and Holter systems need calibration?
Yes. Any system that records ECG signals should be checked for amplitude, timing and heart rate accuracy.
Do resting and stress ECG systems need different checks?
Both need amplitude, timing and heart rate checks. Stress systems may also need checks of their integration with treadmills or ergometers, as specified by the manufacturer.
Can a faulty patient cable cause a failed calibration?
Yes. Many apparent machine faults are caused by cables or lead wires. Replacing the cable and retesting often resolves the problem.
Conclusion
ECG machine calibration ensures the waves clinicians read are true to the patient’s heart. With a traceable simulator, a clear schedule and good lead-wire care, hospitals can trust every trace they print.
External reference: NABL India.
Need ECG machines calibrated? Vanavil Calibrations provides on-site medical equipment calibration across Tamil Nadu. Contact our team.